How to Grow Microgreens Indoors
Microgreens are the fastest way to harvest something you grew yourself. Here is the basic tray method, start to finish.
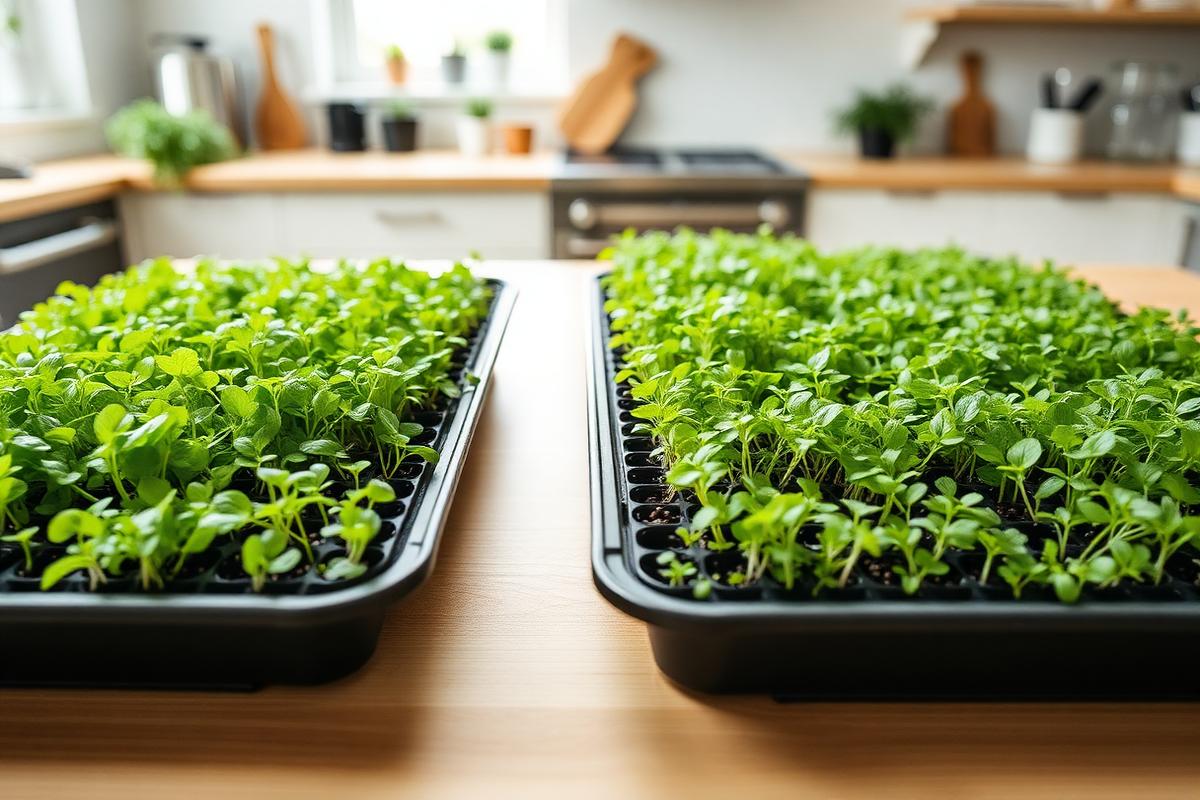
Microgreens are ordinary vegetable and herb seedlings harvested very young. They need a shallow tray, a thin layer of growing medium, seed, and a bright spot.
What you need
- A shallow tray, ideally with a second tray underneath
- Potting mix or a purpose-made growing mat
- Microgreen seed sold for this use
- A spray bottle
- Scissors for harvest
The basic method
1. Fill and level
Add a shallow, even layer of moist medium and press it flat. An uneven surface leads to patchy germination.
2. Sow densely
Microgreens are sown far more thickly than normal seedlings. Spread seed evenly across the surface rather than in rows.
3. Cover and wait
Many growers cover the tray for the first days to keep humidity steady, then uncover once sprouts appear.
4. Light and mist
Move the tray into bright light or under a grow light and keep the surface lightly moist, not soaked.
5. Harvest
Cut just above the medium when the first true leaves appear. Most trays are a single harvest; sow a new tray to keep a steady supply.
A ten-day microgreens cycle, step by step
- 1. Fill a shallow 8 x 12 inch tray with 1.5 inches of damp potting mix and level the surface with your hand — no need to firm it hard.
- 2. Sow densely: about 1-2 tablespoons of small seed such as radish, broccoli or mustard per tray, or 3-4 tablespoons of pea or sunflower seed, soaked overnight first.
- 3. Mist, then cover with a second inverted tray for blackout. Darkness for the first 2-4 days makes stems reach and lengthen evenly.
- 4. Mist once or twice a day under the cover; the seed must never dry out during germination.
- 5. Uncover once shoots are 1.5 inches and lift the sprouted mat. Move to a bright sill or 8 inches under an LED for 12-14 hours a day.
- 6. Water at the base of the tray from day five so the leaves stay dry — wet foliage is the main cause of mold.
- 7. Harvest at days 8-14 by cutting just above soil level with scissors. Rinse, dry well, and use within four to five days.
Reliable varieties and their timings
- Radish: 6-8 days, peppery, almost impossible to fail — the best first crop.
- Broccoli: 8-12 days, mild, popular for everyday use.
- Pea shoots: 10-14 days, sweet and crunchy; soak the seed 8-12 hours before sowing.
- Sunflower: 8-12 days, thick and nutty; rub the seed hulls off after harvest.
- Basil and cilantro: 14-21 days, slower and more demanding — try these third or fourth.
A real example: a rolling two-tray rotation
Two trays and a two-week rhythm give a continuous supply: sow tray A on day 1, tray B on day 7, harvest A around day 10 and resow it, harvest B around day 17. That cycle produces roughly a large handful of greens each week from a countertop area no bigger than a cutting board.
Frequently asked questions
More answers across every topic live on our indoor gardening FAQ.
The Growing Nook Editors
Editorial team
The Growing Nook editors write beginner-friendly indoor gardening guides based on small-space growing: windowsill herbs, salad pots, microgreen trays and shelf setups under LED lights. Every method here is written to be repeatable in an ordinary apartment or kitchen.
Related reading
Best Herbs to Grow Indoors Year-Round
A shortlist of kitchen herbs that stay productive inside, plus placement, harvesting and how to keep a herb from going leggy.
7 min read
Indoor Gardening for Beginners: How to Start Your First Garden
A calm, step-by-step starting point: what to grow first, what you actually need to buy, and how to set up a small indoor garden you can keep alive.
9 min read
10 Easy Vegetables You Can Grow Indoors
Ten realistic container vegetables for a windowsill, shelf or countertop, with what each one needs and how much space to set aside.
8 min read
Enjoyed this guide?
Get occasional indoor gardening tips and inspiration by email.